Trong hướng dẫn này, bạn sẽ được giải thích cách install Lighttpd với PHP, PHP-FPM và MariaDB trên phiên bản CentOS 7. Lighttpd là một máy chủ web mã nguồn mở, an toàn, nhanh chóng, linh hoạt và tối ưu hơn, được thiết kế cho các môi trường yêu cầu tốc độ cao với sử dụng bộ nhớ ít hơn so với các máy chủ web khác.
Nó có thể xử lý đến 10.000 kết nối song song trên một máy chủ với quản lý tải CPU hiệu quả và đi kèm với một bộ tính năng nâng cao như FastCGI, SCGI, Auth, Output-Compression, URL-Rewriting và nhiều tính năng khác.
Lighttpd là một giải pháp tuyệt vời cho mọi máy chủ Linux, nhờ hạ tốc độ cơ sở dữ liệu cao cho phép chúng ta mở rộng hiệu suất nhiều lần với cùng một phần cứng so với các máy chủ web thay thế khác.
Để install Lighttpd, đầu tiên, bạn cần cập nhật các gói phần mềm hệ thống và các kho lưu trữ có sẵn bằng cách sử dụng lệnh yum sau.
# yum -y update
Tiếp theo, bạn cần kích hoạt kho lưu trữ EPEL trên hệ thống của bạn và cập nhật các gói phần mềm bằng cách sử dụng các lệnh sau.
# yum -y install epel-release
# yum -y update
Sau khi bạn đã kích hoạt kho lưu trữ EPEL, bạn có thể install Lighttpd bằng cách chạy lệnh:
# yum install lighttpd
Sau khi các gói Lighttpd được cài đặt, bạn có thể khởi động và kích hoạt dịch vụ để tự động khởi động khi máy khởi động và đảm bảo kiểm tra trạng thái bằng cách sử dụng lệnh:
# systemctl start lighttpd
# systemctl enable lighttpd
# systemctl status lighttpd
Bây giờ, xác minh phiên bản Lighttpd đã được cài đặt trên hệ thống của bạn bằng cách sử dụng lệnh sau.
# lighttpd -v

lighttpd/1.4.55 (ssl) - a light and fast webserver
Bây giờ bạn cần cho phép lưu lượng HTTP và HTTPS trên tường lửa.
# firewall-cmd --permanent --zone=public --add-service=http
# firewall-cmd --permanent --zone=public --add-service=https
# firewall-cmd --reload
Bây giờ mở trình duyệt của bạn và nhập địa chỉ URL sau để xem máy chủ web Lighttpd của bạn hoạt động hay không.
http://Your-Domain.comORhttp://Your-IP-addr
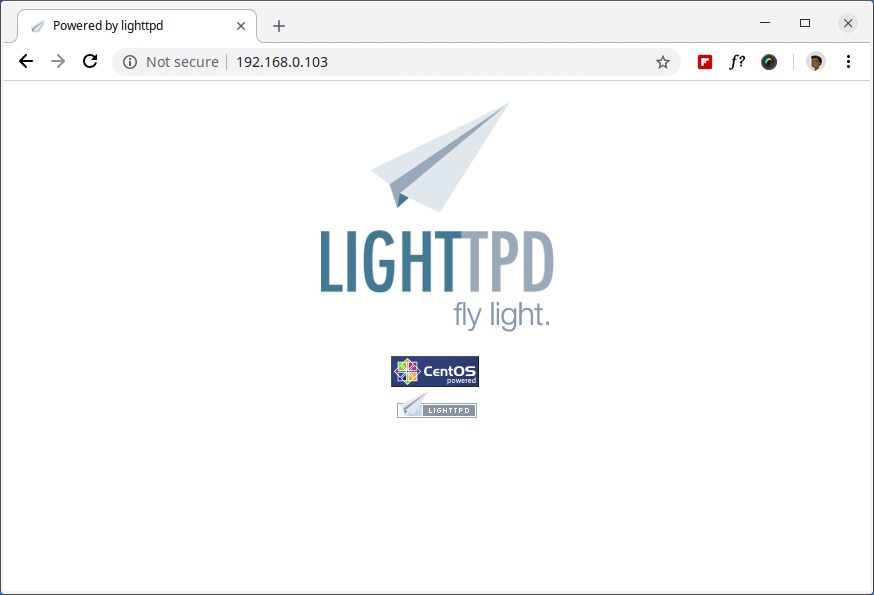
Thư mục gốc mặc định cho tài liệu trong Lighttpd là /var/www/lighttpd/ và tệp cấu hình chính nằm trong /etc/lighttpd/lighttpd.conf.
Tiếp theo, cài đặt hỗ trợ MySQL cho Lighttpd bằng các lệnh sau.
# yum -y install mariadb mariadb-server
Sau khi cài đặt hoàn tất, khởi động, kích hoạt và xác minh trạng thái của MariaDB bằng cách sử dụng các lệnh sau.
# systemctl start mariadb.service
# systemctl enable mariadb.service
# systemctl status mariadb.service
Cuối cùng, bạn sẽ cần bảo mật cài đặt MariaDB của mình bằng cách thực hiện lệnh sau.
# mysql_secure_installation
Bạn sẽ nhận được một số câu hỏi khác nhau liên quan đến cài đặt MariaDB và cách bạn muốn bảo mật nó. Bạn có thể thay đổi mật khẩu người dùng root của cơ sở dữ liệu, vô hiệu hóa cơ sở dữ liệu thử nghiệm, vô hiệu hóa người dùng ẩn danh và vô hiệu hóa đăng nhập root từ xa.
Mẫu đầu ra:
NOTE: RUNNING ALL PARTS OF THIS SCRIPT IS RECOMMENDED FOR ALL MariaDB
SERVERS IN PRODUCTION USE! PLEASE READ EACH STEP CAREFULLY!

In order to log into MariaDB to secure it, we'll need the current
password for the root user. If you've just installed MariaDB, and
you haven't set the root password yet, the password will be blank,
so you should just press enter here.

Enter current password for root (enter for none): Enter OK, successfully used password, moving on... Setting the root password ensures that nobody can log into the MariaDB root user without the proper authorization. Set root password? [Y/n] y New password: Re-enter new password: Password updated successfully! Reloading privilege tables.. ... Success! By default, a MariaDB installation has an anonymous user, allowing anyone to log into MariaDB without having to have a user account created for them. This is intended only for testing, and to make the installation go a bit smoother. You should remove them before moving into a production environment. Remove anonymous users? [Y/n] y ... Success! Normally, root should only be allowed to connect from 'localhost'. This ensures that someone cannot guess at the root password from the network. Disallow root login remotely? [Y/n] y ... Success! By default, MariaDB comes with a database named 'test' that anyone can access. This is also intended only for testing and should be removed before moving into a production environment. Remove test database and access to it? [Y/n] y - Dropping test database... ... Success! - Removing privileges on test database... ... Success! Reloading the privilege tables will ensure that all changes made so far will take effect immediately. Reload privilege tables now? [Y/n] y ... Success! Cleaning up... All done! If you've completed all of the above steps, your MariaDB installation should now be secure. Thanks for using MariaDB!
Thử kết nối đến máy chủ MySQL và xem xét các cơ sở dữ liệu hiện có trên máy chủ cơ sở dữ liệu của bạn bằng các lệnh sau trên cửa sổ terminal.
# mysql -u root -p
Mẫu đầu ra:
Enter password:
Welcome to the MariaDB monitor. Commands end with ; or \g.
Your MariaDB connection id is 10
Server version: 5.5.60-MariaDB MariaDB Server

Copyright (c) 2000, 2018, Oracle, MariaDB Corporation Ab and others.

Type 'help;' or '\h' for help. Type '\c' to clear the current input statement.

MariaDB [(none)]> show databases;
+--------------------+
| Database |
+--------------------+
| information_schema |
| mysql |
| performance_schema |
+--------------------+
3 rows in set (0.00 sec)

MariaDB [(none)]>
Để kích hoạt PHP-FPM với hỗ trợ FastCGI, trước tiên, bạn cần cài đặt PHP cùng với các tiện ích mở rộng cần thiết bằng cách sử dụng lệnh:
# yum -y install php php-mysqlnd php-pdo php-gd php-mbstring
Sau khi cài đặt PHP, bây giờ hãy kích hoạt hỗ trợ PHP-FPM và FastCGI cho Lighttpd, để làm điều này bạn cũng cần cài đặt các gói này.
# yum -y install php-fpm lighttpd-fastcgi
Bây giờ hãy mở tệp có tên /etc/php-fpm.d/www.conf.
# vi /etc/php-fpm.d/www.conf
Đặt người dùng và nhóm thành Lighttpd.
; Unix user/group of processes
; Note: The user is mandatory. If the group is not set, the default user's group
; will be used.
; RPM: apache Choosed to be able to access some dir as httpd
user = lighttpd
; RPM: Keep a group allowed to write in log dir.
group = lighttpd
Ngoài ra, PHP-FPM mặc định sử dụng socket /var/run/php/php7.0-fpm.sock, bạn cần thiết lập PHP-FPM để sử dụng kết nối TCP. Đặt dòng listen như sau:
;listen = /var/run/php/php7.0-fpm.sock
listen = 127.0.0.1:9000
Bây giờ khởi động dịch vụ PHP-FPM và đảm bảo kích hoạt nó để tự động khởi động khi máy khởi động bằng cách sử dụng các lệnh sau.
# systemctl start php-fpm.service
# systemctl enable php-fpm.service
Ở đây, chúng ta cần chỉnh sửa ba tệp /etc/php.ini, /etc/lighttpd/modules.conf và /etc/lighttpd/conf.d/fastcgi.conf để kích hoạt hỗ trợ PHP cho Lighttpd.
Mở tệp đầu tiên /etc/php.ini .
# vi /etc/php.ini
Bỏ chú thích khỏi dòng sau có chứa cgi.fix_pathinfo=1.
; cgi.fix_pathinfo provides *real* PATH_INFO/PATH_TRANSLATED support for CGI. PHP's
; previous behaviour was to set PATH_TRANSLATED to SCRIPT_FILENAME, and to not grok
; what PATH_INFO is. For more information on PATH_INFO, see the cgi specs. Setting
; this to 1 will cause PHP CGI to fix its paths to conform to the spec. A setting
; of zero causes PHP to behave as before. Default is 1. You should fix your scripts
; to use SCRIPT_FILENAME rather than PATH_TRANSLATED.
; http://php.net/cgi.fix-pathinfo
cgi.fix_pathinfo=1
Tiếp theo, mở tệp thứ hai có tên /etc/lighttpd/modules.conf.
# vi /etc/lighttpd/modules.conf
Bỏ chú thích khỏi dòng sau có chứa include "conf.d/fastcgi.conf".
##
## FastCGI (mod_fastcgi)
##
include "conf.d/fastcgi.conf"
Tiếp theo, mở tệp thứ ba có tên /etc/lighttpd/conf.d/fastcgi.conf.
# vi /etc/lighttpd/conf.d/fastcgi.conf
Bây giờ thêm đoạn mã sau vào cuối tệp và lưu lại.
fastcgi.server += ( ".php" =>
           ((
                         "host" => "127.0.0.1",
                         "port" => "9000",
                         "broken-scriptfilename" => "enable"
           ))
)
Khởi động lại dịch vụ Lighttpd để phản ánh các thay đổi và kích hoạt hỗ trợ PHP.
# systemctl restart lighttpd
Như đã đề cập ở trên rằng thư mục gốc mặc định cho Lighttpd là /var/www/lighttpd/. Vì vậy, ở đây chúng ta sẽ tạo một tệp phpinfo.php trong thư mục này.
# vi /var/www/lighttpd/info.php
Thêm các dòng sau vào tệp. Đoạn mã nhỏ này sẽ hiển thị thông tin về cài đặt PHP cùng với phiên bản của chúng.
<?php
phpinfo();
?>
Mở trình duyệt của bạn và điều hướng đến các liên kết sau.
http://Your-Domain.com/info.php
OR
http://Your-IP-addr/info.php
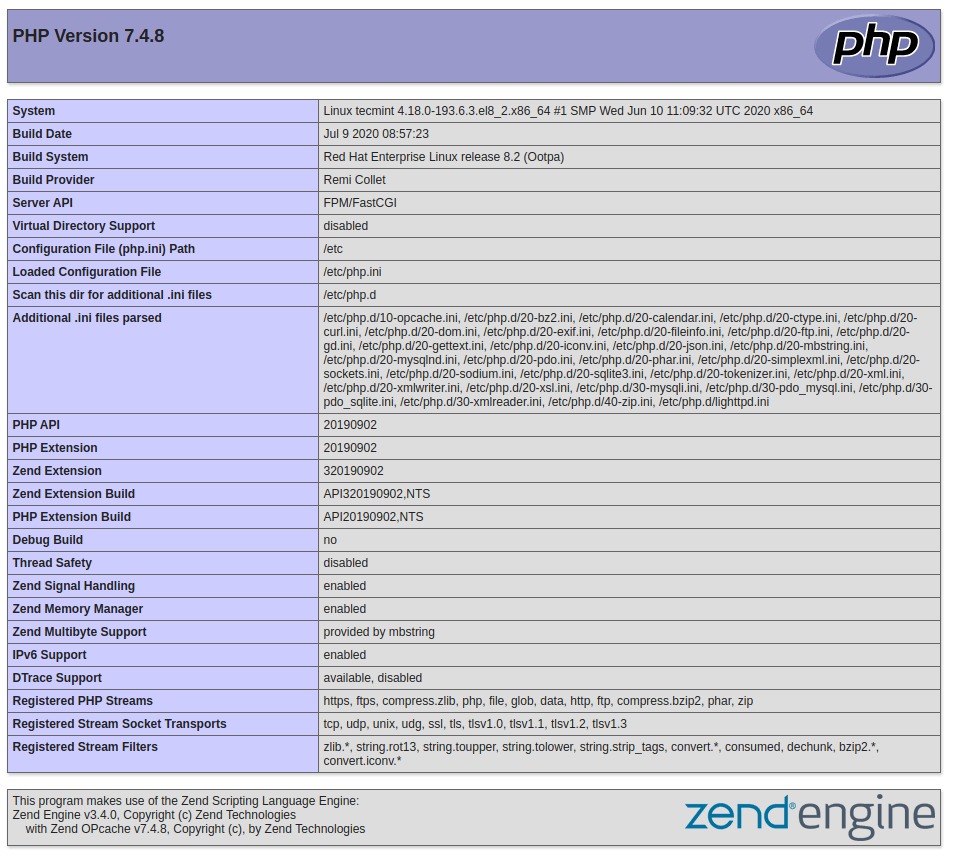
Bạn sẽ thấy thông tin hoạt động về PHP, PHP-FPM và MySQL cùng với rất nhiều mô-đun khác đã được kích hoạt.
Mọi người cũng tìm kiếm: lighttpd
Tips: Tham gia Channel Telegram KDATA để không bỏ sót khuyến mãi hot nào
 English