
Các nhà phát triển đã phát triển các công cụ độc lập dựa trên giao diện đồ họa (GUI) với khả năng quản lý một số lĩnh vực cụ thể của hệ thống và thực hiện các nhiệm vụ quản trị liên quan. Các công cụ này bao gồm Apache Directory, phpMyAdmin, MySQL Workbench, Webmin, Ajenti, ISPConfig, Shorewall, cPanel, Cockpit, CUPS, YaST và nhiều công cụ khác. Dưới đây sẽ là hướng dẫn install ISPConfig Ubuntu 22.04.
ISPConfig là gì? Các tính năng chính của ISPConfig là gì?
Hướng dẫn này sẽ hướng dẫn cách cài đặt và cấu hình bảng điều khiển ISPConfig trên Ubuntu 22.04.
Đối với hướng dẫn này, bạn sẽ cần một hệ thống Ubuntu 22.04 với các thông số sau:
Bạn cũng cần phải cấu hình một tên máy chủ (hostname):
sudo hostnamectl set-hostname ispconfig.kdata.com.vn
Thêm tên máy chủ vào tệp /etc/hosts.
$ sudo vim /etc/hosts
#127.0.0.1 localhost.localdomain localhost
# Dòng này nên được thay đổi thành tên máy chủ chính xác:
127.0.0.1 ispconfig.kdata.com.vn
Lưu tệp và kiểm tra các thay đổi.
$ hostname -f
ispconfig.kdata.com.vn
Cập nhật hệ thống.
sudo apt update && sudo apt upgrade -y
ISPConfig cung cấp một trình cài đặt giúp việc cài đặt và cấu hình dễ dàng hơn. Để xem tất cả các tùy chọn cấu hình có sẵn cho cài đặt, thực hiện lệnh:
$ wget -O - https://get.ispconfig.org | sudo sh -s -- --help
********************************************************************************ISPConfig 3 Autoinstaller
********************************************************************************

Usage: ispc3-ai.sh [<argument>] [...]

This script automatically installs all needed packages for an ISPConfig 3 setup using the guidelines from the "Perfect Server Setup" howtos on www.howtoforge.com.


Possible arguments are:
--help Show this help page
--debug Enable verbose logging (logs each command with the exit
code)
--channel Choose the channel to use for ISPConfig.
--channel=<stable|dev>
"stable" is the latest ISPConfig release available on
www.ispconfig.org
"dev" is the latest dev-branch from the ISPConfig git
repository:
https://git.ispconfig.org/ispconfig/ispconfig3/tree/develop
-> The dev channel might contain bugs and less-tested
features and should only be used in production by very
experienced users.
--lang Use language for ISPConfig installation. Specify with
--lang=en|de (only en (English) and de (German) supported
currently).
--interactive Don't install ISPConfig in non-interactive mode. This is
needed if you want to use expert mode, e. g. to install a
slave server that shall be integrated into an existing
multiserver setup.
--use-nginx Use nginx webserver instead of apache2
--use-amavis Use amavis instead of rspamd for mail filtering
--use-unbound Use unbound instead of bind9 for local resolving. Only
allowed if --no-dns is set.
--use-php Use specific PHP versions, comma separated, instead of
installing multiple PHP, e.g. --use-php=7.4,8.0 (5.6, 7.0,
7.1, 7.2, 7.3, 7.4, 8.0 and 8.1 available).
--use-php=system disables the sury repository and just
installs the system's default PHP version.
ommiting the argument (use all versions)
--use-ftp-ports This option sets the passive port range for pure-ftpd. You
have to specify the port range separated by hyphen, e. g.
--use-ftp-ports=40110-40210.
If not provided the passive port range will not be
configured.
--use-certbot Use Certbot instead of acme.sh for issuing Let's Encrypt
certificates. Not adviced unless you are migrating from a
old server that uses Certbot.
--no-web Do not use ISPConfig on this server to manage webserver
setting and don't install nginx/apache or pureftpd. This
will also prevent installing an ISPConfig UI and implies
--no-roundcube as well as --no-pma
--no-mail Do not use ISPConfig on this server to manage mailserver
settings. This will install postfix for sending system
mails, but not dovecot and not configure any settings for
ISPConfig mail. It implies --no-mailman.
--no-dns Do not use ISPConfig on this server to manage DNS entries.
Bind will be installed for local DNS caching / resolving
only.
--no-local-dns Do not install local DNS caching / resolving via bind.
--no-firewall Do not install ufw and tell ISPConfig to not manage firewall
settings on this server.
--no-roundcube Do not install roundcube webmail.
--roundcube Install Roundcube even when --no-mail is used. Manual
configuration of Roundcube config is needed.
--no-pma Do not install PHPMyAdmin on this server.
--no-mailman Do not install Mailman mailing list manager.
--no-quota Disable file system quota
--no-ntp Disable NTP setup
--monit Install Monit and set it up to monitor installed services.
Supported services: Apache2, NGINX, MariaDB,
pure-ftpd-mysql, php-fpm, ssh, named, Postfix, Dovecot,
rspamd.
--monit-alert-email
Set up alerts for Monit to be send to given e-mail address.
e.g. --monit-alert-email=me@example.com
--unattended-upgrades
Install UnattendedUpgrades. You can add extra arguments for
automatic cleanup and automatic reboots when necessary with
--unattended-upgrades=autoclean,reboot (or only one of
them).
--i-know-what-i-am-doing
Prevent the autoinstaller to ask for confirmation before
continuing to reconfigure the server.
Trong hướng dẫn này, chúng tôi sẽ chạy ISPConfig với Nginx, PHP 8.0, MariaDB, Postfix, Dovecot, Rspamd, BIND, Jailkit, Roundcube, PHPMyAdmin, Mailman, Webalizer, AWStats, GoAccess.
wget -O - https://get.ispconfig.org | sudo sh -s -- --use-nginx --use-php=8.0 --use-ftp-ports=21-22 --lang=en --no-quota --unattended-upgrades
Bạn cũng có thể sử dụng Apache trong thiết lập.
wget -O - https://get.ispconfig.org | sudo sh -s -- --use-php=8.0 --use-ftp-ports=21-22 --lang=en --no-quota --unattended-upgrades
Tiếp tục bằng cách xác nhận việc cài đặt.
WARNING! This script will reconfigure your complete server!
It should be run on a freshly installed server and all current configuration that you have done will most likely be lost!
Type 'yes' if you really want to continue: yes
Bạn sẽ được cung cấp mật khẩu Admin và mật khẩu MySQL. Hãy lưu lại những mật khẩu này vì bạn có thể cần chúng sau này.
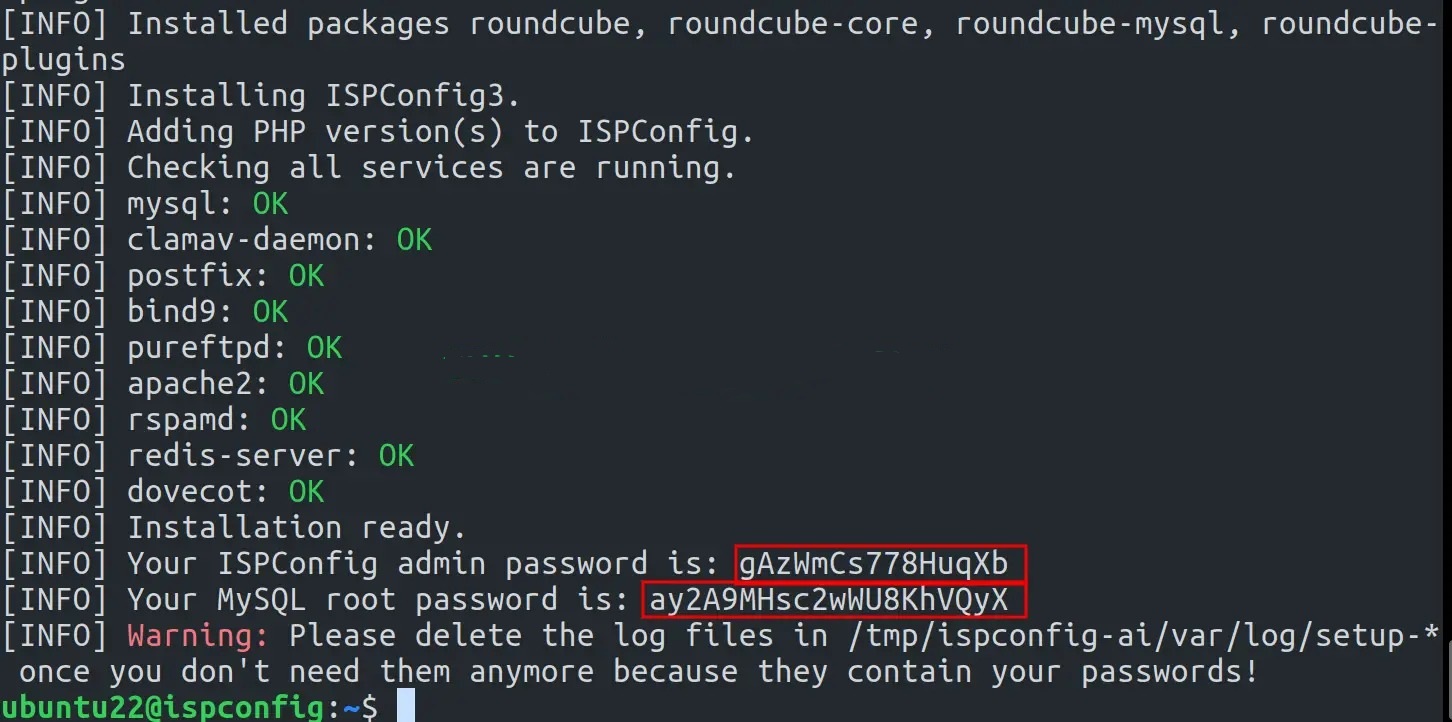
Sau khi cài đặt hoàn tất, đăng nhập vào giao diện Web ISPConfig bằng URL https://domain_name:8080.
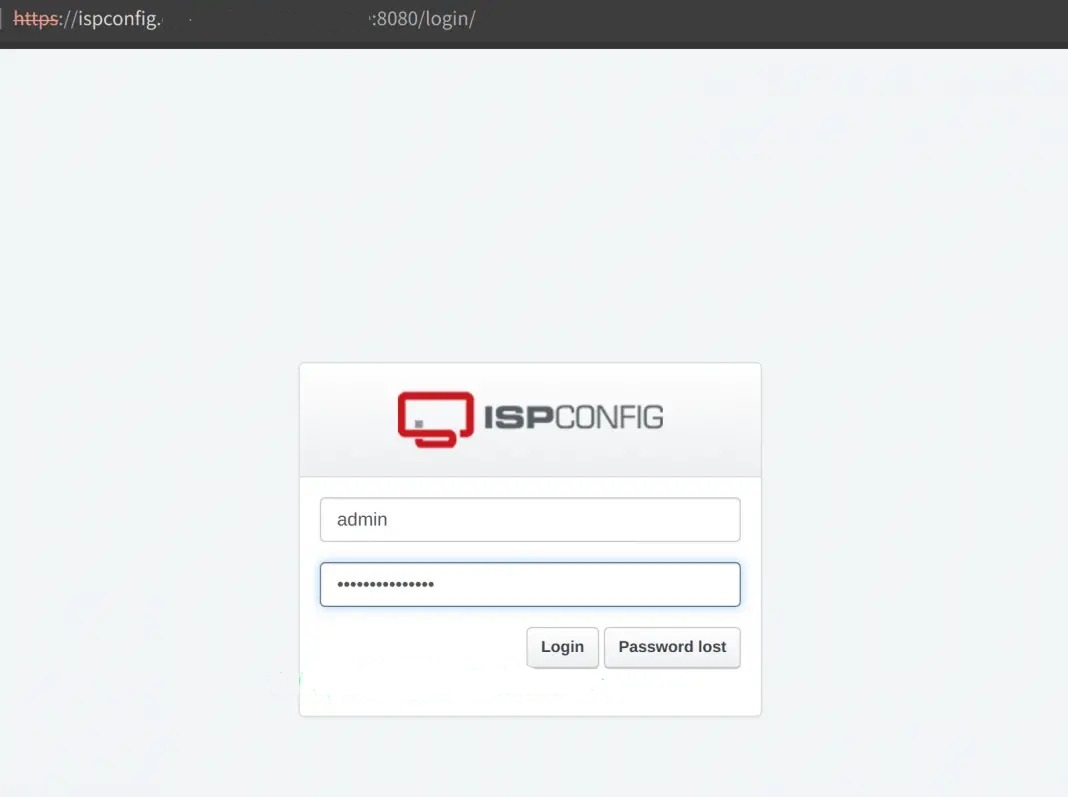
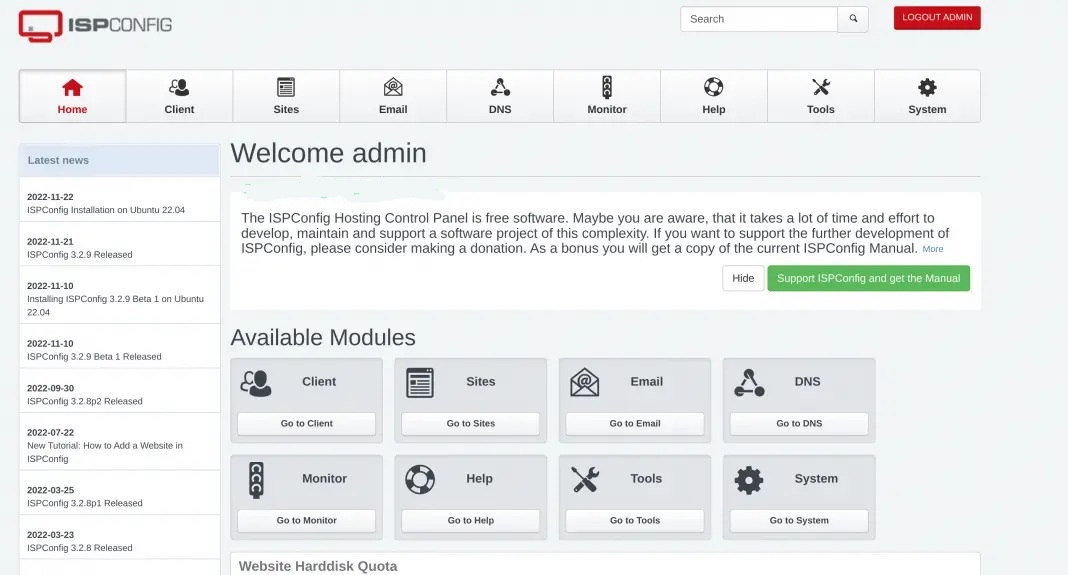
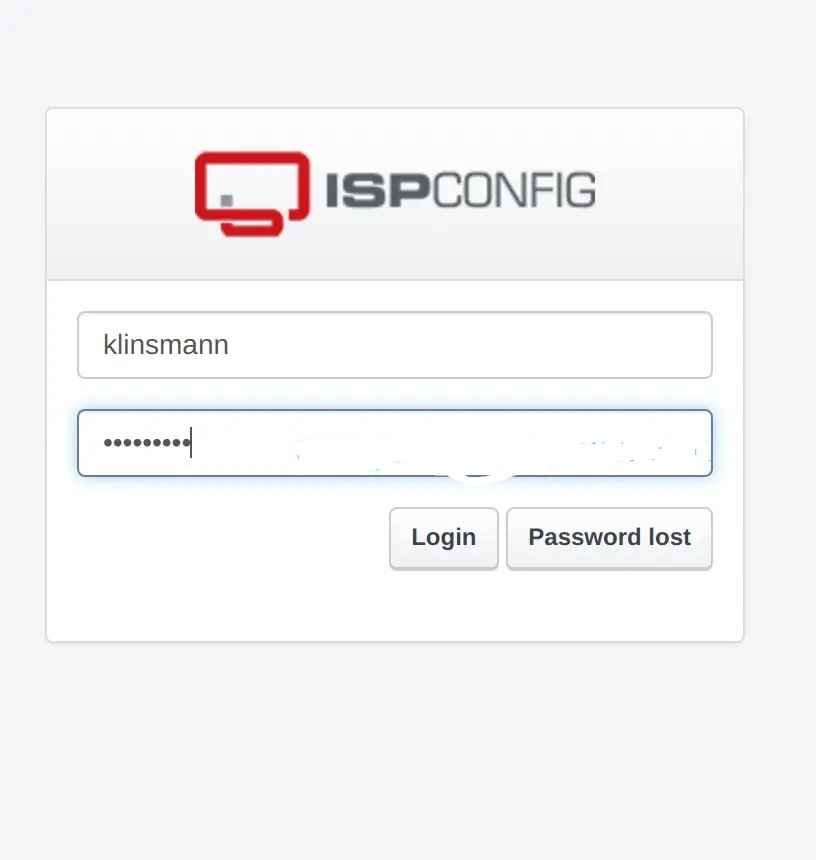
Cung cấp thông tin đăng nhập cho người dùng quản trị. Sử dụng mật khẩu được hiển thị trong quá trình cài đặt. Sau khi xác thực, bạn sẽ thấy bảng điều khiển như hình dưới đây.
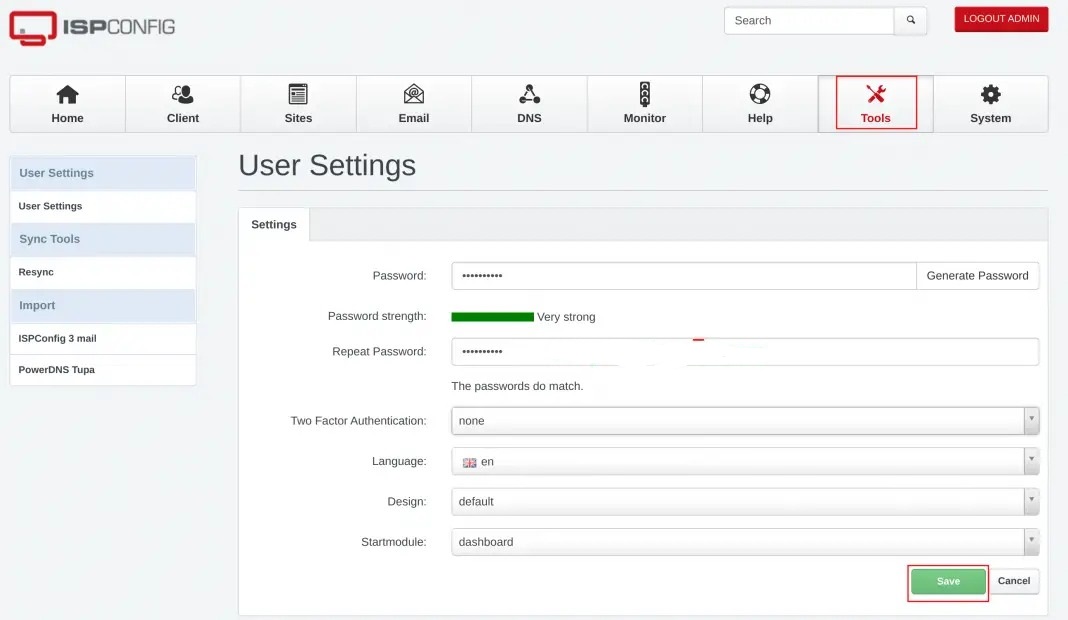
Đổi mật khẩu của người dùng quản trị bằng cách điều hướng đến mục Công cụ (Tools).
Để cấu hình tường lửa, nhấp vào Hệ thống (System) -> Tường lửa (Firewall) -> Thêm bản ghi tường lửa (Add Firewall record).
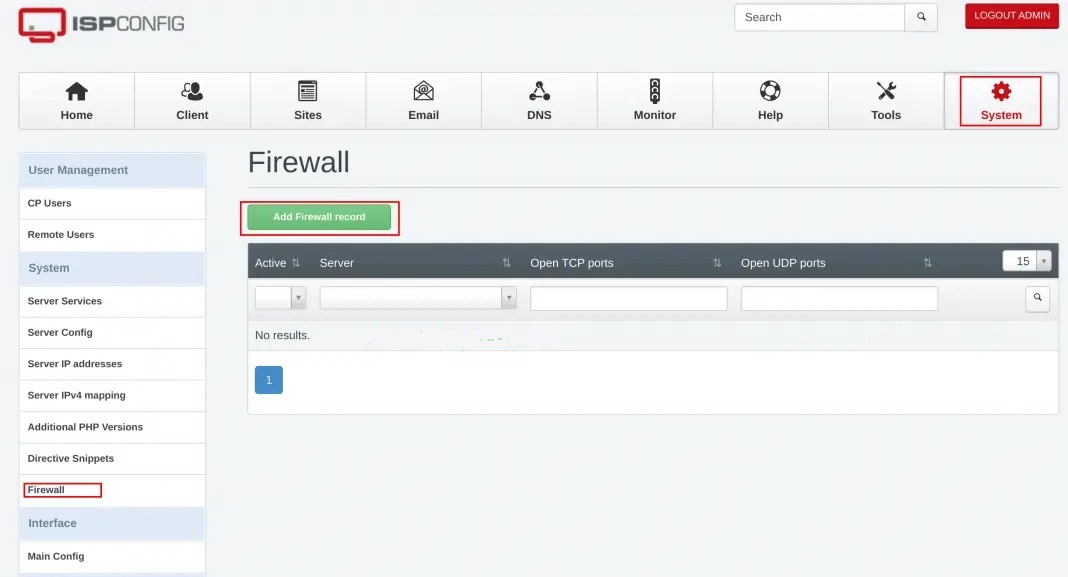
Trong đây, bạn có thể cập nhật bằng cách thêm hoặc loại bỏ một cổng trong danh sách và sau đó lưu lại các thay đổi.
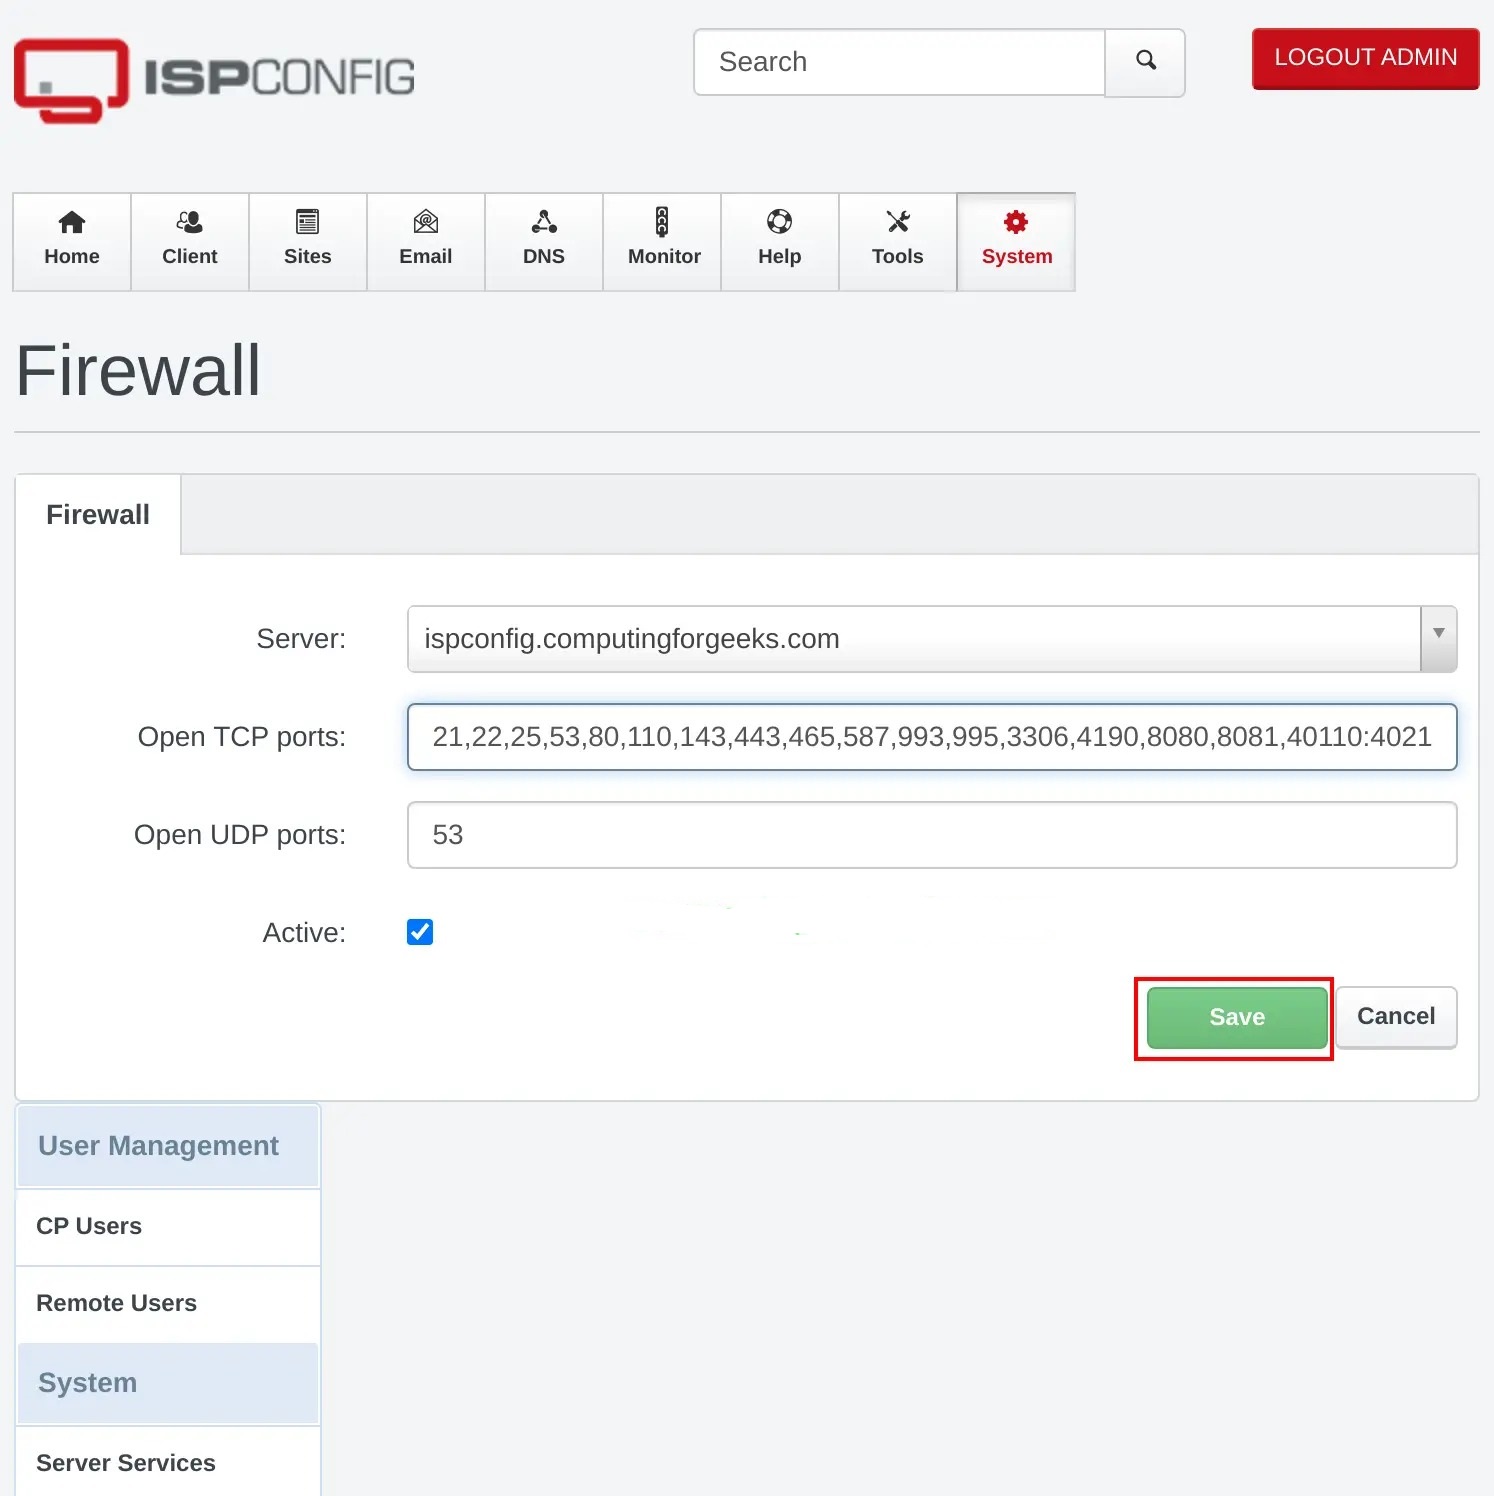
Để thêm một khách hàng, điều hướng đến tab Client và nhấp vào Add new client.
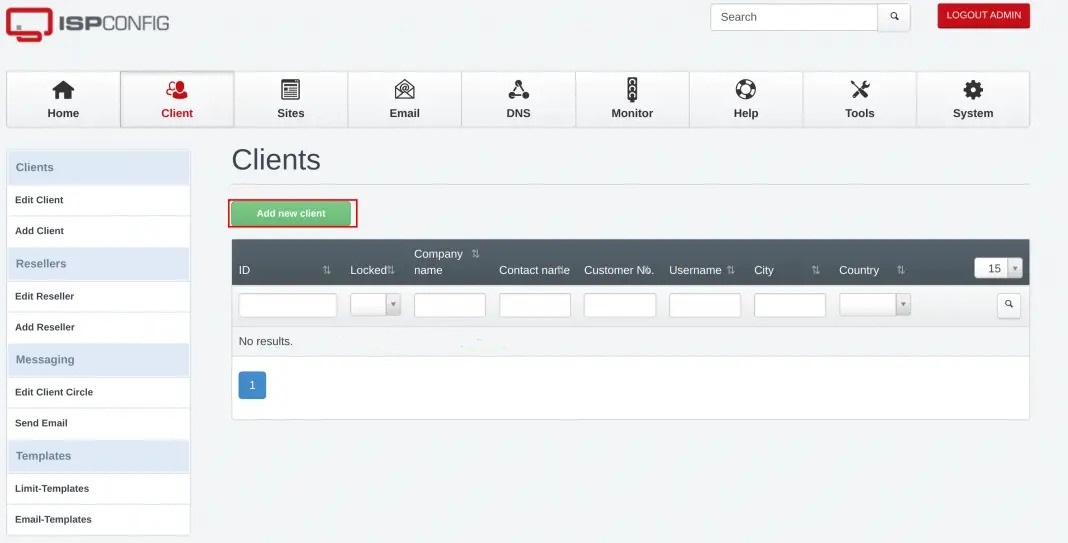
Bạn sẽ phải cung cấp thông tin như tên người dùng, mật khẩu, địa chỉ email và thông tin cơ bản về khách hàng.
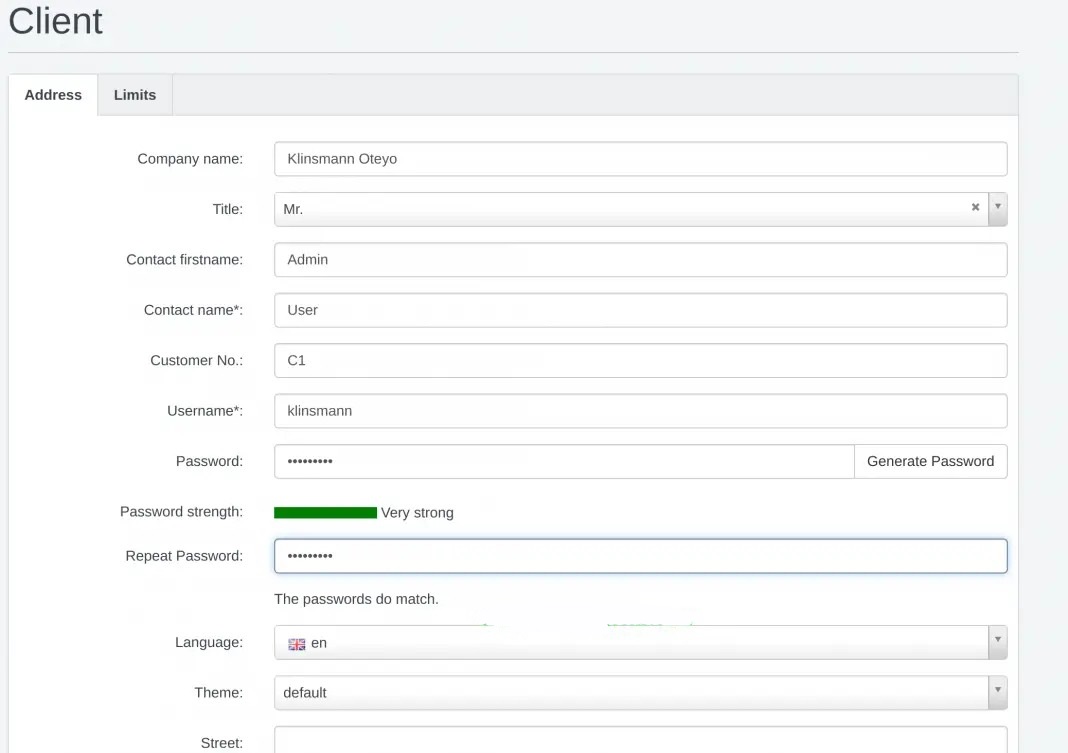
Khi đã tạo xong, bạn có thể đăng nhập bằng người dùng đã được tạo.
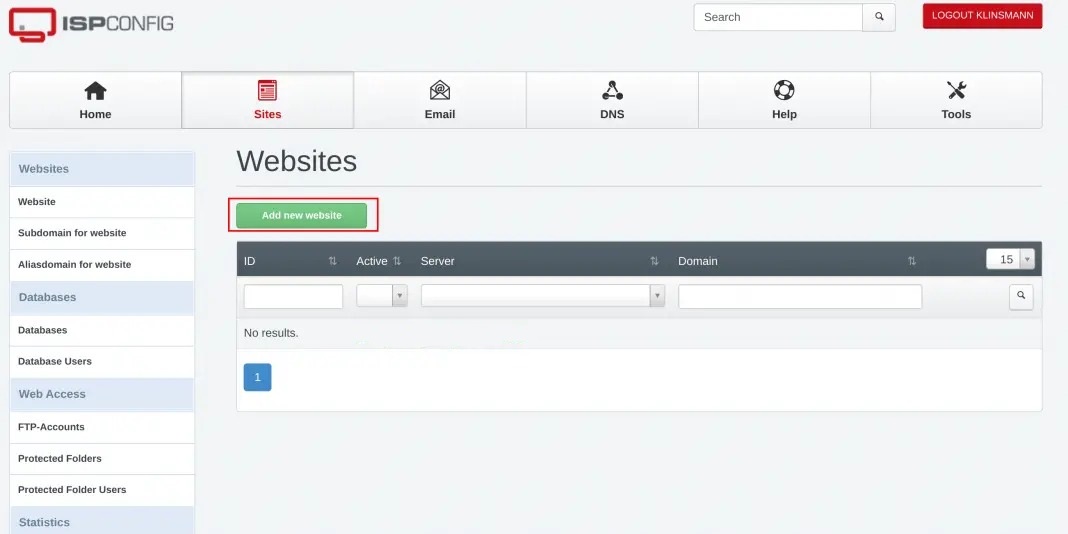
Bây giờ, hãy thêm một trang web bằng cách điều hướng đến mục Trang web (Sites) -> Thêm trang web mới (Add new website).
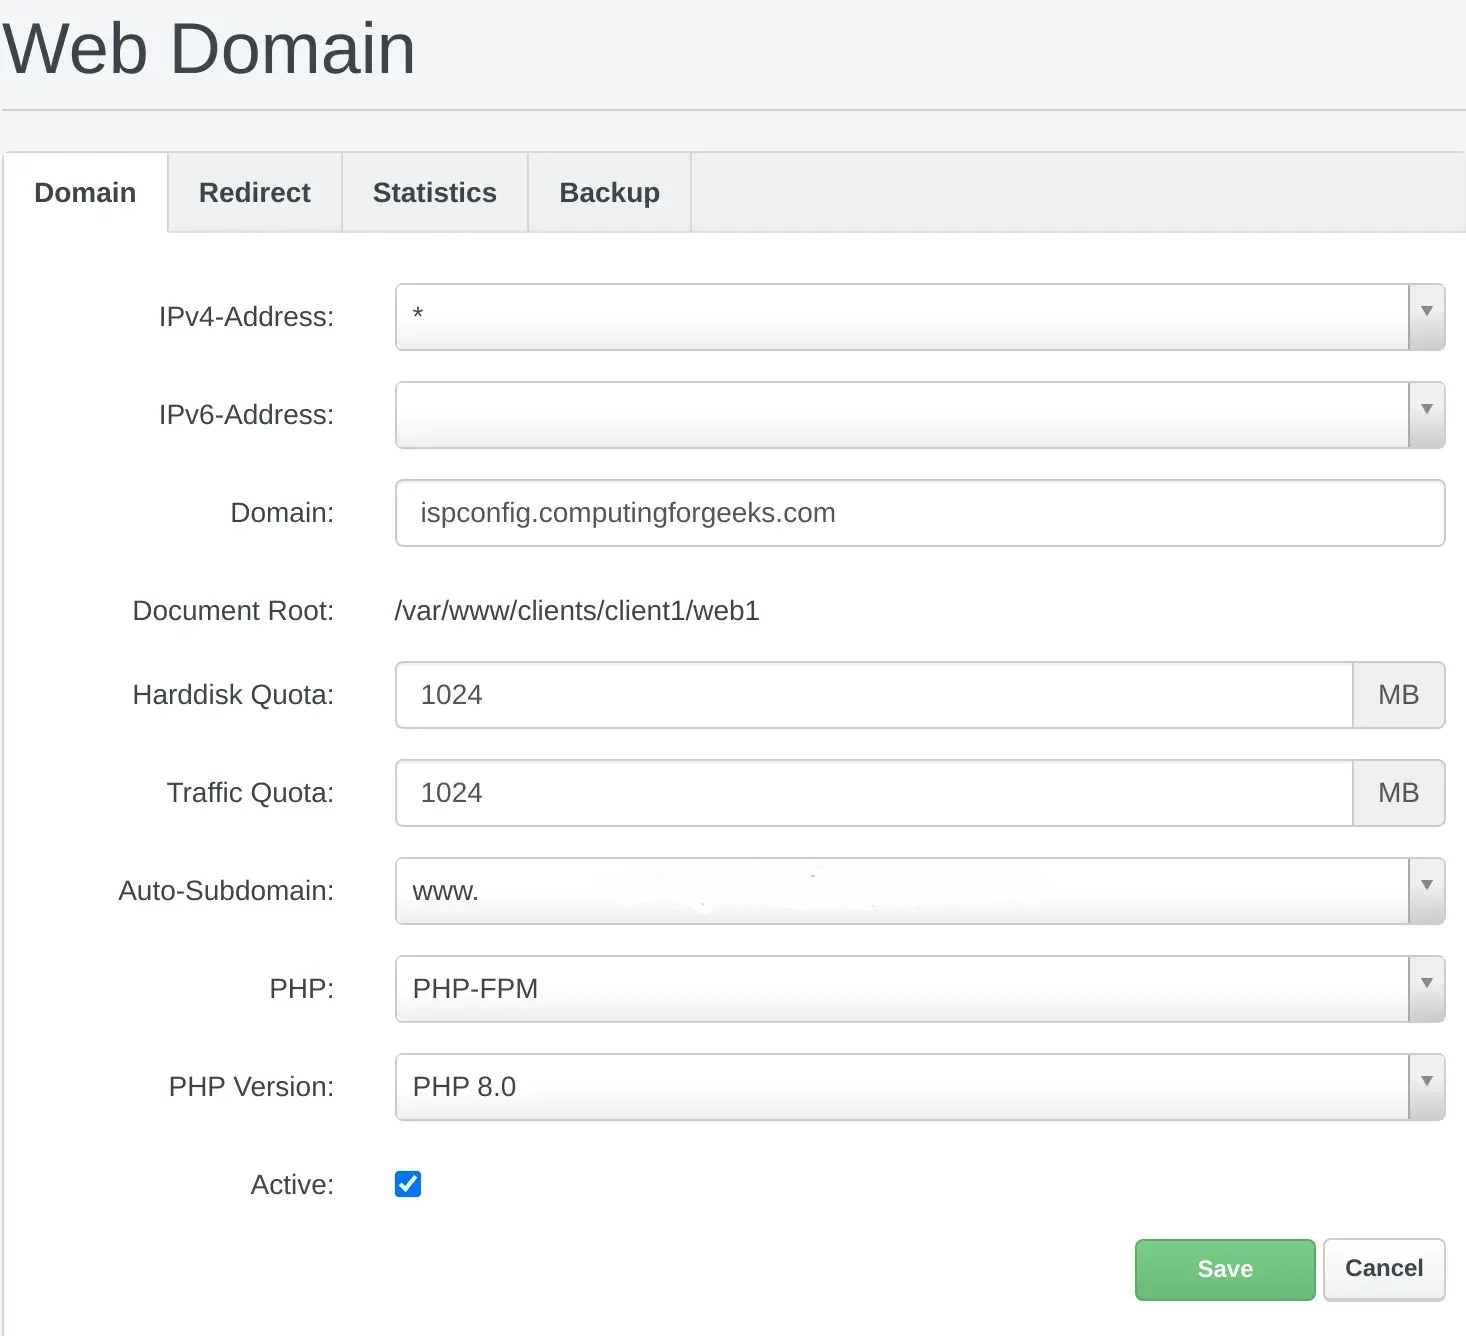
Bây giờ, cung cấp thông tin như Tên miền, Không gian lưu trữ, Khối lượng truy cập và Phiên bản PHP, sau đó nhấn Lưu khi hoàn thành.
Trang web đã được tạo sẽ có sẵn như được hiển thị.
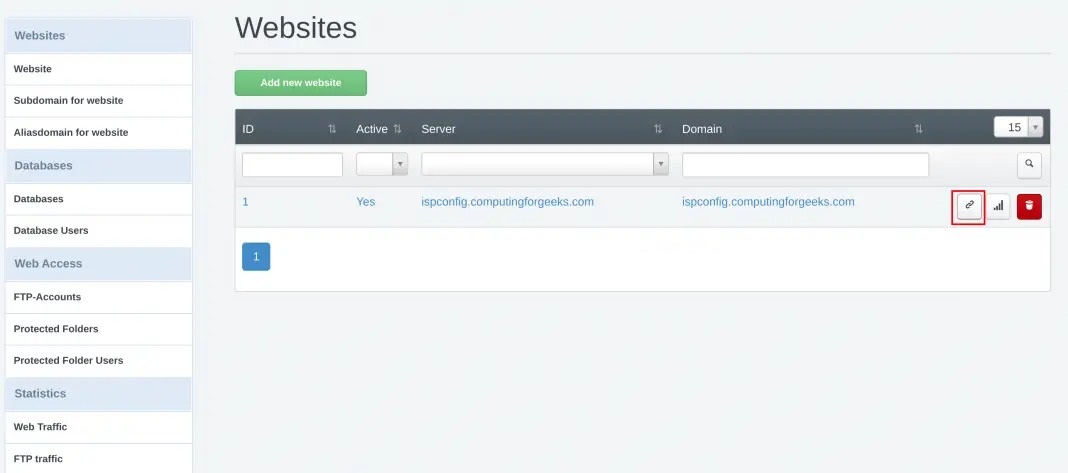
Để truy cập trang web, nhấp vào biểu tượng được đánh dấu bên trên. Đối với Apache, bạn cần tắt trang mặc định.
sudo a2dissite 000-default.conf
sudo systemctl restart apache2
Nếu mọi thứ ổn, bạn nên thấy trang web của mình như được hiển thị bên dưới:
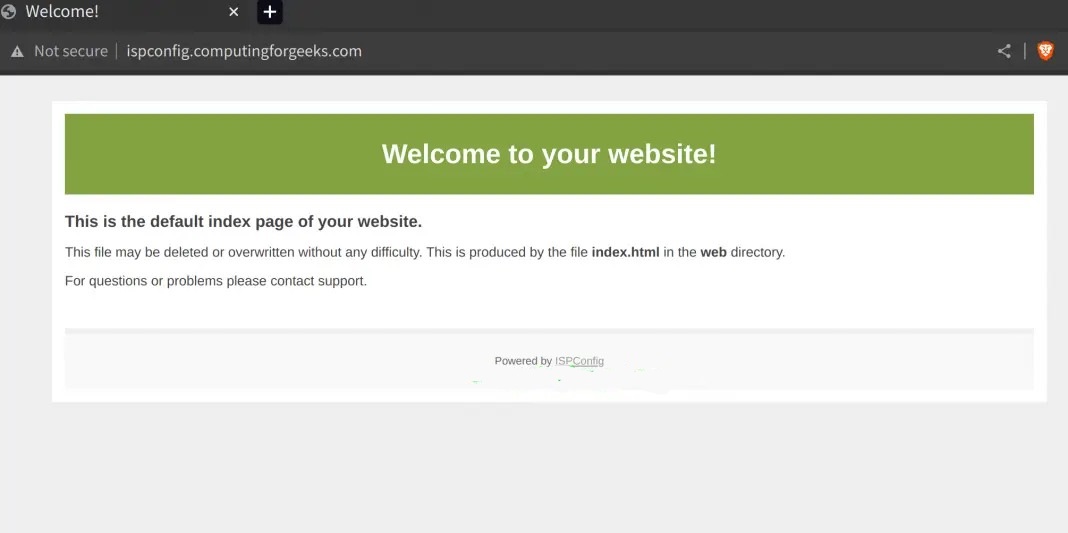
Install ISPConfig Ubuntu 22.04 đã hoàn tất và bạn đã có một bảng điều khiển quản lý hệ thống mạnh mẽ để quản lý các dịch vụ web và hệ thống của mình. Với ISPConfig, bạn có khả năng dễ dàng quản lý các khía cạnh quan trọng của máy chủ và trang website.
Tips: Tham gia Channel Telegram KDATA để không bỏ sót khuyến mãi hot nào